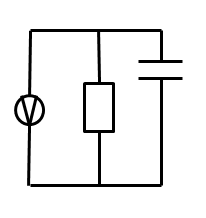
Method 5Figure 3:
Figure 3 shows how the circuit was assembled. Table 1.
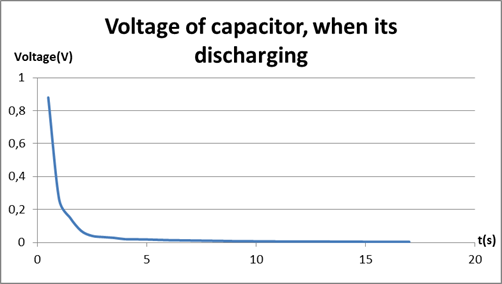
Graph 1.
In method 5, for help like in method 2 was used video camera, to record values of voltage of resistance. First of all, before resistance was connected to capacitor, capacitor was charged. Capacitor was charged with a voltage ≈ 20V and it was charged ≈ 10-15 seconds. After that, when capacitor was charged enough, capacitor was putted into the system which was make before. Camera fixed values of Voltage and time on the timer (Table 2 shows results). In method 5 shows effect like discharge of the capacitor. Charge of capacitor going throw the resistor and because of that going discharge of capacitor. In table 2 shows that voltage in the end was equal only 0.4, it is mean that disgorging of the capacitor was not perfect and something do not give to capacitor discharge finally. Capacitance of the capacitor was calculated from formula which was written in the beginning: Was did some transformation with that formula:
So, it is mean that: Summary and Errors of Part A
Method 1: On method 1, the value of the capacitance of the capacitor is much lower than the real value. From the calculation, we got 0.733μF as the final result of the capacitance, but it should be 4.7μF. This could be caused by some errors and mistakes which were made while the experiment was carried out. The key reason why this occurs is that the first capacitor has a lot of electrons that might go outside the route of the capacitor. Method 4: Method 4, for me is one of the most accurate methods which have less error than other methods. Also, this result more accurate value shown by the multi-meter. Method 5: On Method 5, going discharge of the capacitor and there all depends from the resistance. If external resistor will have small resistance, discharging of the capacitor will be very fast and will be very hard to record all values of the voltage around resistor. Second problem, if resistance of the resistor is big, charge might go throw the Voltmeter, which also have resistance (resistance of the Voltmeter is large In conclusion of the summary, the best way to find capacitance of the capacitor for me will be Method 4.
Part B: Making our own capacitor. Materials: Two scroll of aluminium foil and two scroll of paper.
Before we start to make the capacitor, we need to organise the aluminium foils and papers. First of all, we need to put paper in the bottom. Secondly, put the aluminium foil above it. Do this 2 set (paper-aluminium-paper-aluminium). Thirdly, roll the entire layer of paper and aluminium foil we have organized and cover it by paper. After it is done, we should check the capacitor whether if there are any mistakes. For example; one of the biggest mistakes occurs when one aluminium foil touch another aluminium foil. Parameters of the foil length=6.5m weight=0.25m, so area of capacitor should be
After the capacitor is done and everything is checked, the experiment can be carried out using the methods used in part A.
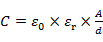
Theory First of all, I will find theory value of the capacitance of the capacitor which was made by me. To find it, we use the formula: Value of the permittivity of the paper (actually it is LDPE) which I found in the internet is equal to: (resources: http://www.camelotplast.ru/info/polietilen-visokogo-davleniya.php) With this, we can find the theory capacitance of the capacitor:
Method 1
|


 .
.

 ). Therefore, the capacitance values of the capacitor which was calculated in the beginning going down, but then rapidly go up. And for the value of the capacitance of the capacitor always choosing second result because based on formula
  , value of the capacitance depends on the
  , so it is mean that first value of the capacitance have no
  . The distance between aluminium foils is thick if the paper, which equal ≈
  .
. .
.